7 Tips for Choosing the Best Lithium RV Battery

Time:2026-11-05 Author:Isabella
0%

Choosing the right Lithium Rv Battery means matching your power needs to the way you actually travel. A weekend camper running lights and a fridge has different demands from a full-time traveler using an inverter. RV electrical educator Mike Sokol offers a useful reminder: “Size the battery around your real loads, charging sources, and installation limits.” Check that advice against your own equipment and the battery maker’s specifications.

Start with usable capacity, not just the advertised amp-hour figure. Then confirm voltage, continuous and peak current, and whether the battery’s built-in battery management system can protect against overloads. Small details matter. A battery that looks ideal on paper may not suit your inverter or existing charger. Verify charging compatibility, including low-temperature protection if you camp in freezing conditions. A heater inside the battery can help, but it also draws power.

Weight, dimensions, warranty terms, and support deserve a place in your comparison. Measure the compartment before ordering; a few centimeters can turn a simple installation into an awkward project. Ask how the warranty handles deep cycling and routine use, and keep the documentation. Not always. The lowest price may still be sensible for light use, while a premium model may be wasteful. These seven tips will help you compare batteries with clearer priorities, though no checklist replaces checking your RV’s wiring and manufacturer guidance. Take your time.
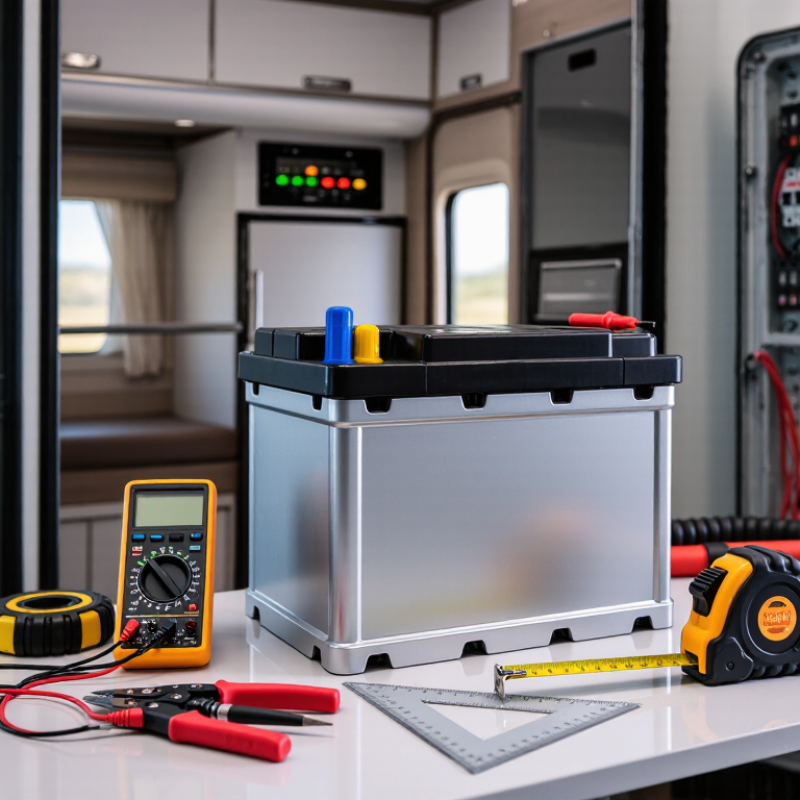
7 Tips for Choosing the Best Lithium RV Battery

Assess RV Energy Use and Size Battery Capacity in Amp-Hours

Start with a realistic load list, not just the number printed on each appliance’s label. A 12-volt fridge may cycle, while lights draw power only briefly; measure actual use over a full day when possible. Record each device’s watts and estimated hours of use, then multiply them to calculate watt-hours. Include phone charging, water-pump use, and furnace-fan runtime. Small loads add up. If you camp off-grid, account for an extra night or a cloudy day instead of assuming ideal conditions. Measure, then adjust. For example, a daily total of 900 watt-hours requires about 75 amp-hours at 12 volts, before conversion losses.

To estimate battery capacity, divide daily watt-hours by the battery’s nominal voltage. Add capacity for inverter losses and the reserve you want for unexpected use. AC appliances, such as a coffee maker, can draw substantial power through an inverter, so include their runtime carefully. Then check the battery’s stated usable capacity and recommended discharge limits; specifications differ. Avoid treating every rated amp-hour as available energy. A simple spreadsheet can reveal whether the fridge or furnace fan drives most of your demand. Real use will vary with weather and habits, so revisit your estimate after a trip.

Estimate Your RV’s Daily Energy Use

Typical daily consumption by appliance, shown as amp-hours at a nominal 12.8V.

These example estimates total about 101 Ah per day. For one day of use, allowing a 20% reserve and planning to use no more than 80% of nominal battery capacity, 101 Ah × 1.2 ÷ 0.8 is about 152 Ah; a 160 Ah lithium battery is a practical starting point. Actual usage varies with appliance models, weather, and time spent off-grid, so track your own loads before choosing a battery.

Match System Voltage: A 12.8 V LiFePO₄ Battery Uses Four Cells

Before choosing a lithium RV battery, check the voltage printed on your existing system and the requirements in your equipment manuals. A 12.8 V LiFePO₄ battery contains four cells connected in series, each with a nominal voltage of about 3.2 V. Their combined nominal voltage is 12.8 V. That distinction matters. “12 V” describes the system class, while 12.8 V is the battery’s nominal rating; actual voltage changes as the battery charges and discharges.

Check the inverter, charger, solar controller, and any alternator charger for compatibility with LiFePO₄ charging. A charger designed only for lead-acid batteries may use settings that do not suit the new battery. Also confirm that the battery’s management system supports your expected loads. For example, a microwave inverter can draw substantial current, even when the voltage matches. If you plan to connect batteries together, verify whether the system allows series or parallel connections; these arrangements affect voltage or capacity differently. It is easy to focus on the label and overlook the charger. Read the manuals, and ask a qualified RV technician if specifications conflict.

Compare Usable Capacity at 80% Depth of Discharge

Tip: Compare usable capacity, not just the amp-hour number on the case. At 80% depth of discharge, a 100 Ah battery provides about 80 Ah before reaching that limit. This makes two batteries easier to compare fairly. Check the manufacturer’s stated usable capacity, since specifications and discharge limits can differ.

Tip: Match the calculation to your RV routine. A fridge, lights, and a water pump may draw modest power, while an inverter running a coffee maker can use much more. If your daily use is around 60 Ah, an 80 Ah usable battery leaves little cushion. Add up real loads, and allow room for cloudy days or an unexpectedly long stop.

Tip: Treat 80% as a comparison point, not a guarantee of what reaches your appliances. Inverter losses, cold conditions, battery age, and the battery management system can affect available energy. Check the battery’s temperature limits and reserve guidance. A battery monitor helps, though its readings are estimates. Check the math. Then compare batteries using the same discharge limit and your own usage figures. That estimate may still be imperfect. Real trips have a way of proving it.

Check Cycle-Life Ratings: Quality LiFePO₄ Packs Often Exceed 2,000 Cycles

Cycle-life ratings matter because an RV battery is repeatedly charged at campgrounds, solar sites, and between trips. Battery University’s technical overview, “BU-205: Types of Lithium-ion,” lists LiFePO₄ among chemistries capable of roughly 2,000 or more cycles under suitable conditions. Treat that figure as a test result, not a guarantee. A rating may assume a specific discharge depth, temperature, and cutoff voltage. Ask what conditions produced the number, and whether “end of life” means 80% remaining capacity or another threshold. A bare cycle count tells only part of the story.

NREL battery-life modeling identifies temperature and operating patterns as important influences on battery aging. In an RV, a hot storage compartment or frequent deep discharges can shorten service life. Check the test depth of discharge, such as 80% or 100%, and compare ratings only when test conditions match. A pack rated for 2,000 cycles at 100% discharge is not directly comparable with one tested at 80%. Look for a written test method and a capacity-retention definition. Small details matter. I would also leave some margin: real trips rarely follow tidy laboratory cycles, and published ratings can make long-term performance sound more certain than it is.

Verify BMS Ratings and Temperature Limits, Including 0°C Minimum Charging

A lithium RV battery can show ample capacity yet still be a poor match if its BMS cannot handle your inverter’s current demand. Check both continuous and short-duration peak discharge ratings, plus the maximum charging current. Compare them with the loads you actually use, such as a microwave startup or a heater running overnight. IEC 62619:2022 sets safety requirements and tests for industrial lithium batteries, but it does not establish one universal BMS rating for every RV. The battery’s own specifications matter. Check the fine print.

Temperature protection deserves equal attention. Many RV lithium-battery specifications set 0°C as the minimum charging temperature; below that, charging may be blocked to reduce the risk of lithium plating. Waldmann and colleagues discuss temperature-related aging and degradation in Journal of Power Sources 262 (2014), pages 129–135. A BMS cutoff is useful, but it is not a heating system, and it does not guarantee charging can resume immediately when the battery warms. Ask whether the stated limit refers to cell temperature or surrounding air temperature. Also confirm whether the BMS provides low-temperature charge cutoff and whether the system supports battery heating. Cold mornings can expose a gap between a safe specification and a usable setup. I would not assume the RV’s interior temperature tells you what is happening inside a battery compartment.

7 Tips for Choosing the Best Lithium RV Battery - Verify BMS Ratings and Temperature Limits, Including 0°C Minimum Charging
Tip What to Check Practical Guidance Why It Matters
1. Match capacity to your energy use Rated capacity in amp-hours (Ah) and nominal energy in watt-hours (Wh). A 12.8 V, 100 Ah battery stores about 1,280 Wh nominally. Estimate daily use from each appliance’s watts × hours, then allow for conversion losses and reserve capacity. A realistic energy budget helps prevent undersizing and avoids relying on the full rated capacity every day.
2. Verify BMS current ratings Continuous discharge current, short-duration peak current, and maximum charge current. Estimate load current using watts ÷ battery voltage. For example, a 1,000 W load at 12 V draws about 83 A before inverter losses. Check that the BMS supports the expected continuous load and startup surge. The battery management system (BMS) protects the cells, but an undersized rating can cause protective shutdowns under heavy loads.
3. Confirm the low-temperature charging limit Minimum permitted charging temperature and whether the BMS blocks charging below that limit. Many lithium iron phosphate (LiFePO₄) batteries prohibit charging below 0°C (32°F). Confirm the exact limit in the battery specifications; do not assume every model has the same threshold. Charging LiFePO₄ cells below their specified temperature limit can damage them. A low-temperature charge cutoff helps prevent this.
4. Check cold-weather features Whether the battery has low-temperature charge protection or an integrated self-heating function. If winter charging is expected, verify how any heater operates, including its activation temperature and power source. A heater does not mean the battery can be charged below its stated limit. Cold-weather protection is useful only when its operating conditions match the RV’s installation and use.
5. Match the charging equipment Supported charging voltage and compatibility with the RV converter, solar controller, and alternator system. Use a lithium-compatible charging profile and follow the battery maker’s specified voltage settings. Check whether the existing equipment can disable equalization or other unsuitable charging stages. Correct charging settings help the battery charge safely and avoid conflicts with the RV’s electrical system.
6. Review usable power and system limits Recommended depth of discharge, inverter limits, and any restrictions on series or parallel connections. Use the manufacturer’s guidance for usable capacity and expansion. Confirm that cables, fuses, busbars, and the inverter are rated for the system’s expected current. Battery capacity alone does not determine system performance; installation components and configuration also matter.
7. Check fit, mounting, and documentation Battery dimensions, terminal layout, permitted mounting orientation, operating temperature range, and warranty terms. Measure the compartment and allow room for cables and any required ventilation or heater clearance. Read the installation manual and verify the warranty’s usage conditions. A correctly sized, securely installed battery is easier to maintain and less likely to encounter installation-related problems.

FAQS

How can I estimate my RV’s daily battery use?

List each device, its wattage, and its estimated daily runtime. Include the fridge, lights, phone charging, water pump, and furnace fan. Multiply watts by hours to estimate watt-hours. Measure it first.

How much battery capacity does 900 watt-hours require?

At 12 volts, 900 watt-hours equals about 75 amp-hours before conversion losses. Add capacity for inverter use and your desired reserve. Actual needs vary.

Why should I track appliances instead of relying on their labels?

A fridge may cycle on and off, while lights may run briefly. Label ratings alone can overstate or understate daily use. A full-day log gives a more useful estimate.

How should I account for AC appliances in an RV?

Include their runtime and inverter losses. A coffee maker can draw substantial power, even during a short brew. Check its actual use if possible.

Is all of a battery’s rated amp-hour capacity available?

Not necessarily. Check its stated usable capacity and recommended discharge limits. Specifications differ, so avoid counting every rated amp-hour as available energy.

What does a cycle-life rating of 2,000 cycles mean?

Some LiFePO₄ batteries are rated for roughly 2,000 or more cycles under suitable test conditions. This is not a guaranteed service life. Ask how the battery was tested.

Why do discharge depth and temperature matter?

Deep discharges and hot storage conditions can affect battery aging. Compare cycle ratings only when test conditions are similar. Small details matter.

How can I plan for off-grid trips more realistically?

Include an extra night or a cloudy day in your estimate. Recheck your figures after a trip, especially if the fridge or furnace fan used more energy than expected. I would leave some margin; real trips rarely follow tidy test conditions.

Conclusion

Choosing the right Lithium Rv Battery starts with understanding your energy use. Add up the power consumption of your appliances and estimate how long you’ll use them between charges, then choose a capacity in amp-hours that suits your needs. Make sure the battery’s voltage matches your RV system. A 12.8 V LiFePO₄ battery typically uses four cells connected in series, making it a common option for 12 V setups.

Compare usable capacity, not just the battery’s stated capacity: at an 80% depth of discharge, only about 80% of its rated amp-hours are available for regular use. Also check cycle-life ratings; quality LiFePO₄ batteries often exceed 2,000 cycles, though actual life depends on use and conditions. Finally, review the battery management system’s current ratings and temperature protections. Confirm its charging limits, including whether charging is prohibited below 0°C, so the battery is compatible with your climate and charging routine.


Isabella

Isabella

Isabella is a dedicated marketing professional with a sharp focus on driving brand growth and engagement through strategic content creation. With an extensive background in digital marketing, she combines her passion for storytelling with her keen understanding of industry trends to deliver......